iDogCam Installation Support
Please read through the information below to help guide you through the installation process.
Pre-Installation Checklist Camera Placement Weatherproofing Your Camera Mounting a Camera Connecting a Premium System Connecting a Cloud System Installation Tips Additional Resources / DownloadsPre-Installation Checklist:
Tools and Materials Needed:
|
Site Assessment:
|
Camera Placement:
Location Selection:
|
Angle and Height Recommendations:
|
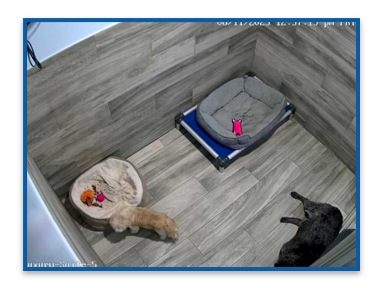
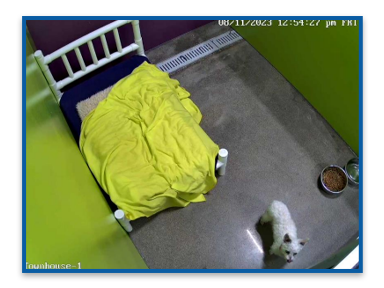
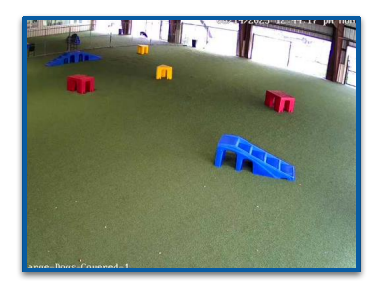
Good Suite Camera Angles:
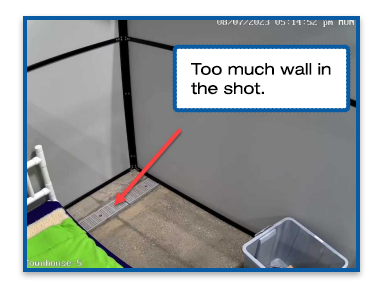
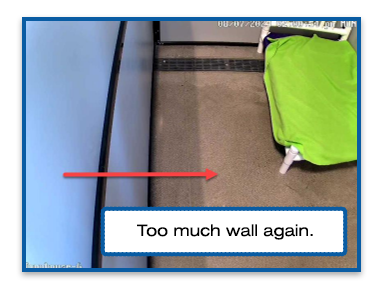
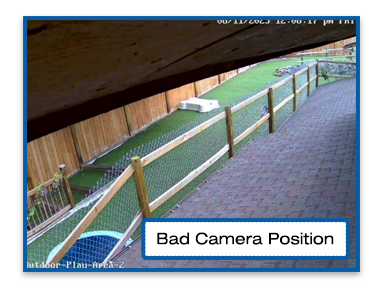
Bad Suite Camera Angles:
Good vs Bad Yard Placement:
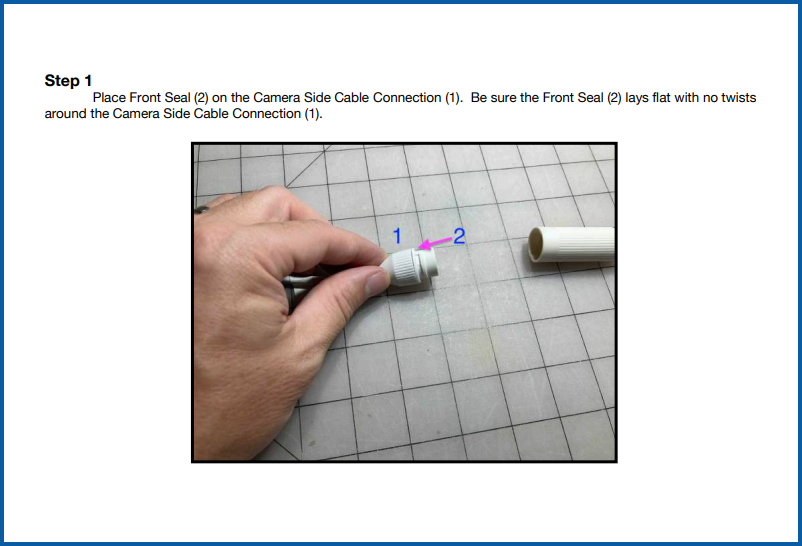
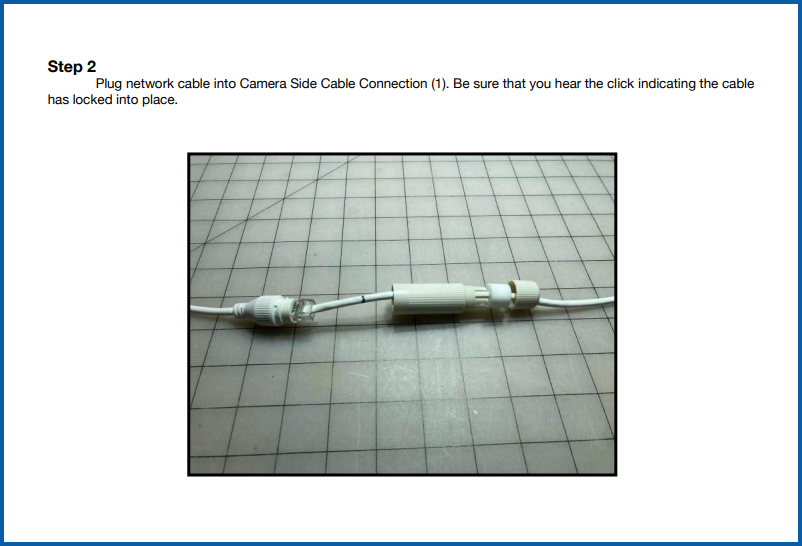
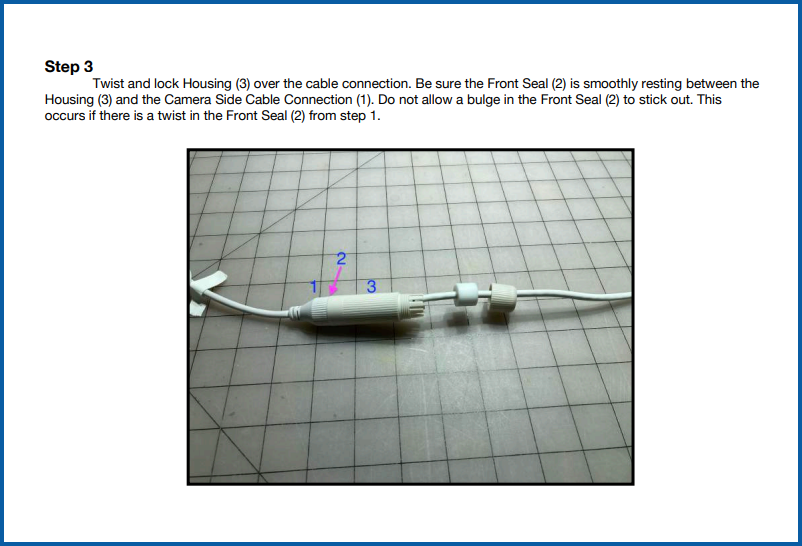
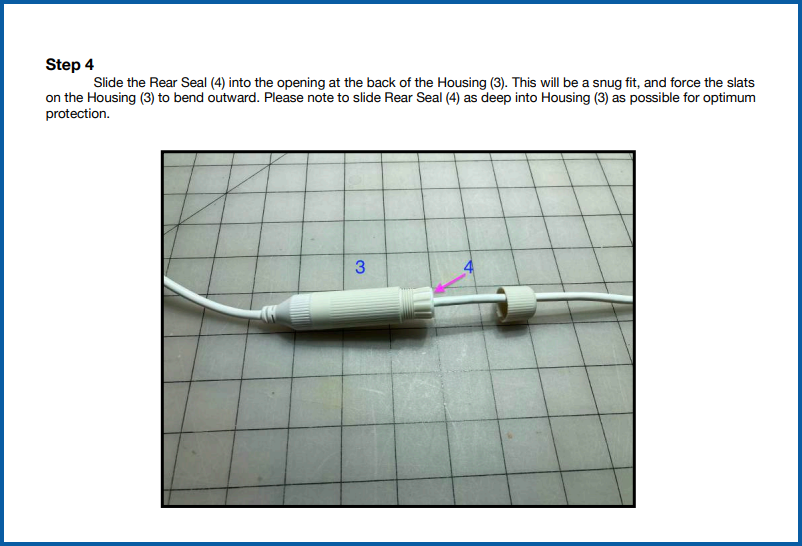
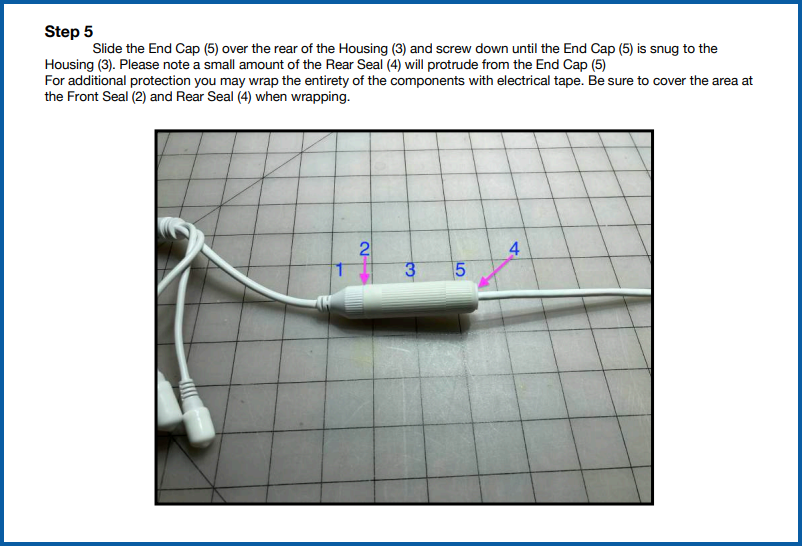
Weatherproofing Your Camera:
While the camera may be weatherproof, it is required to weatherproof the network connections for outdoor installations. This involves protecting equipment from environmental elements like rain, wind, and extreme temperatures. Proper weatherproofing extends the lifespan of cameras and maintains network integrity, ensuring uninterrupted viewing and connectivity. This process requires selecting the right materials and techniques to shield cameras and connections. Below are a step by step guides on weatherproofing an IP camera.
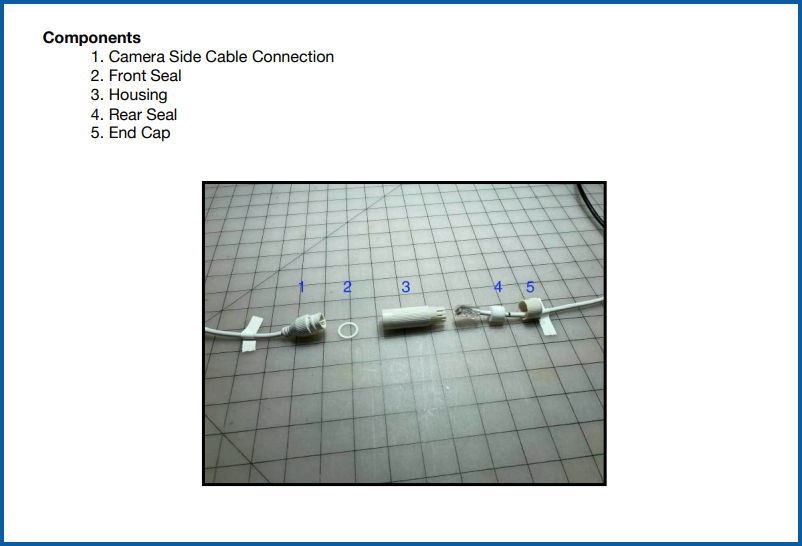
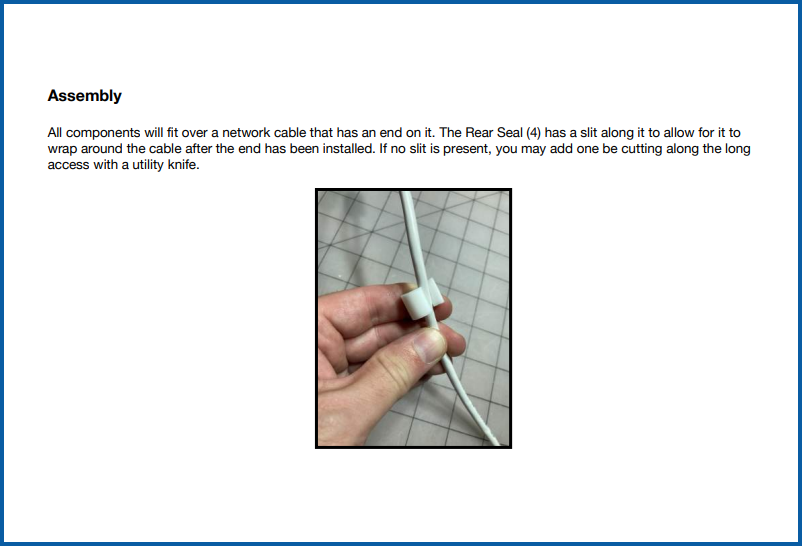
Indoor Cameras - Network Cable Seal:
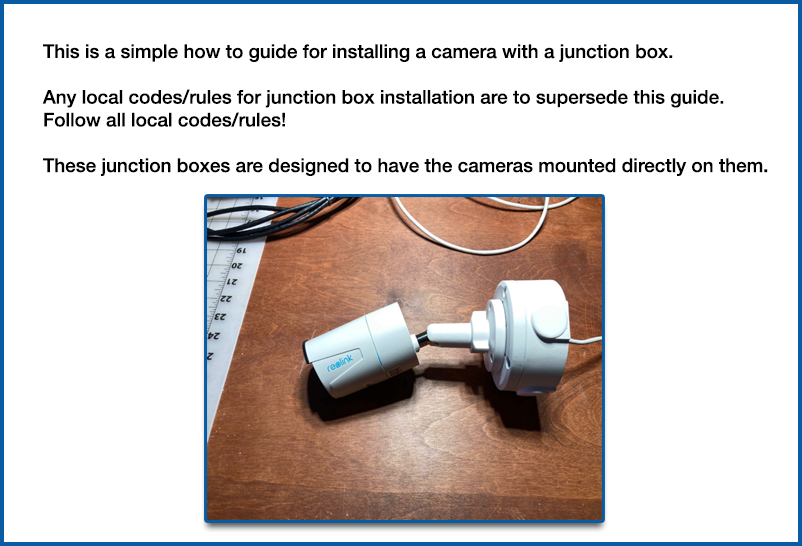
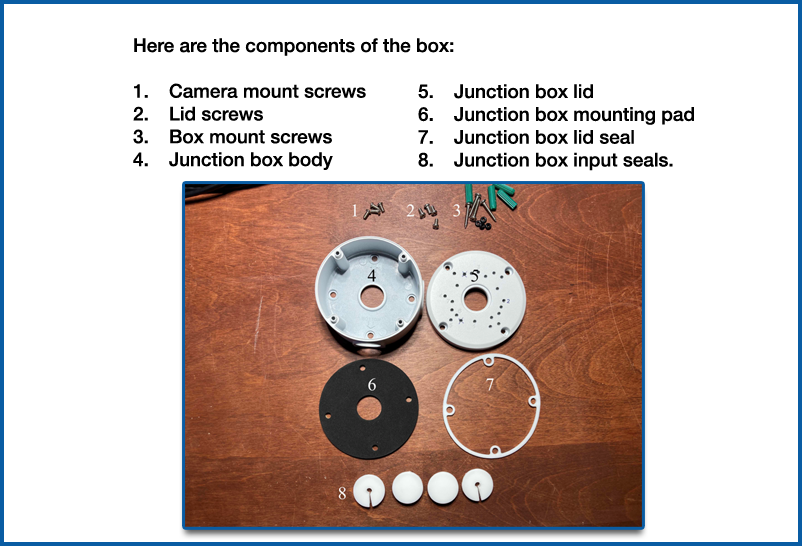
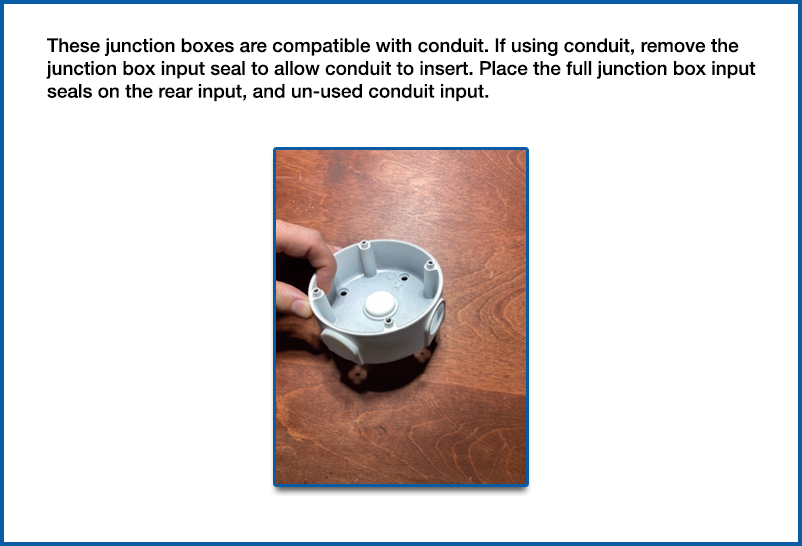
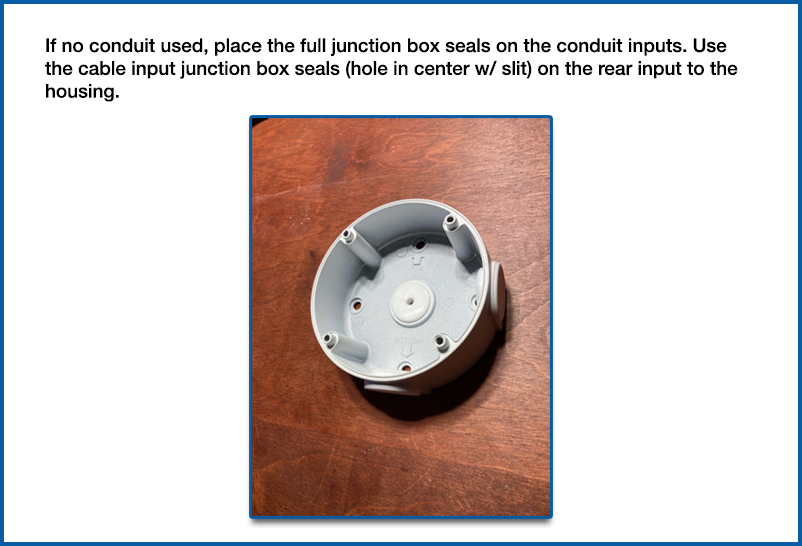
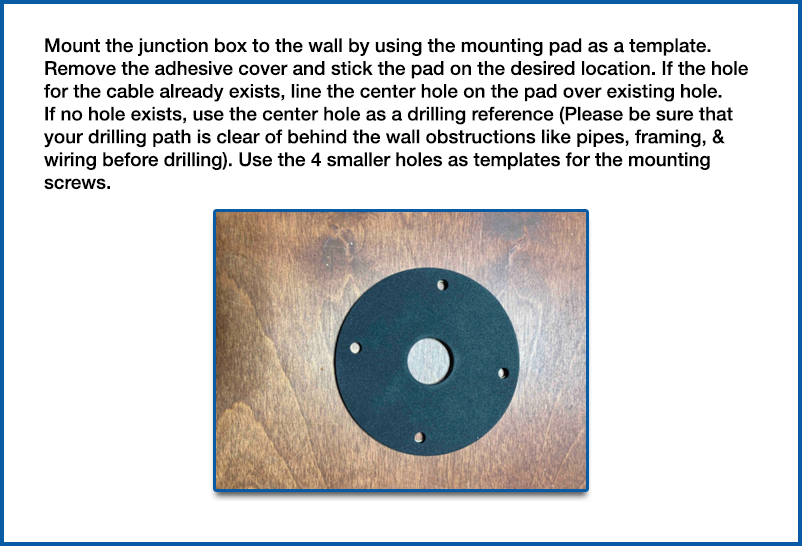
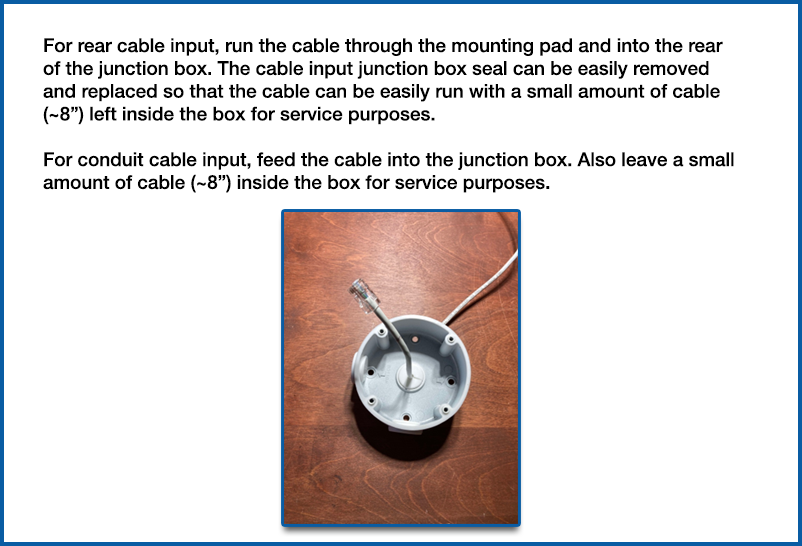
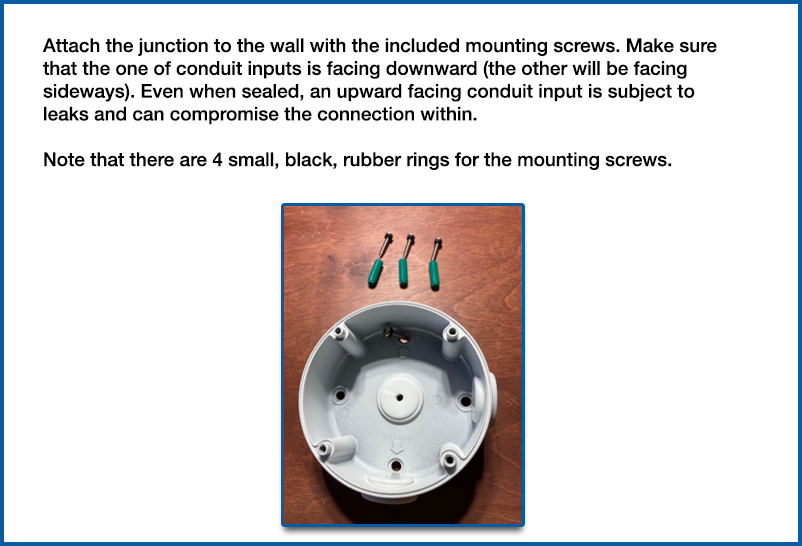
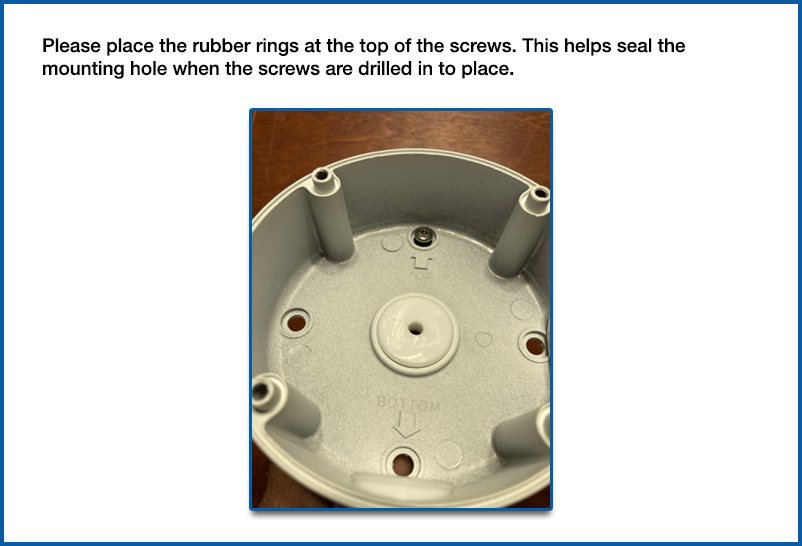
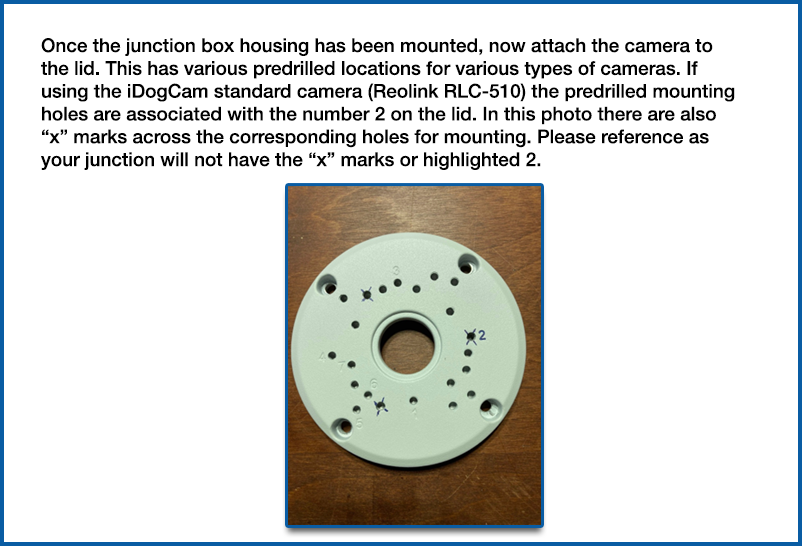
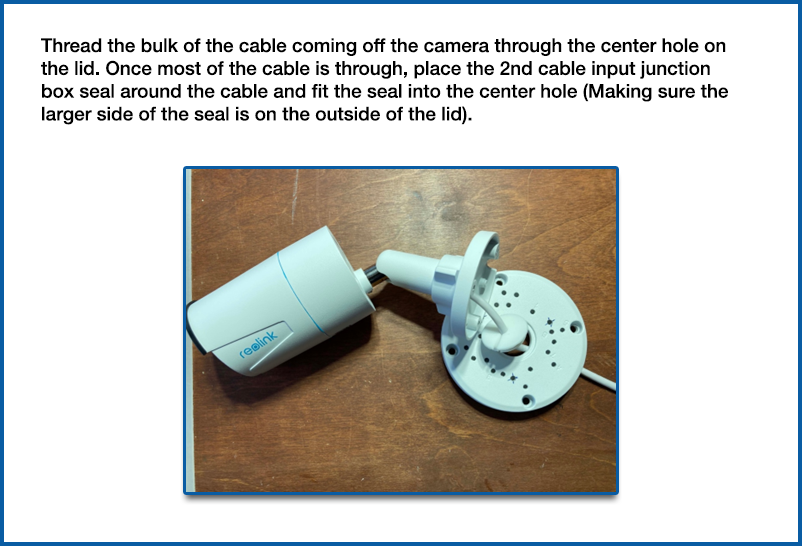
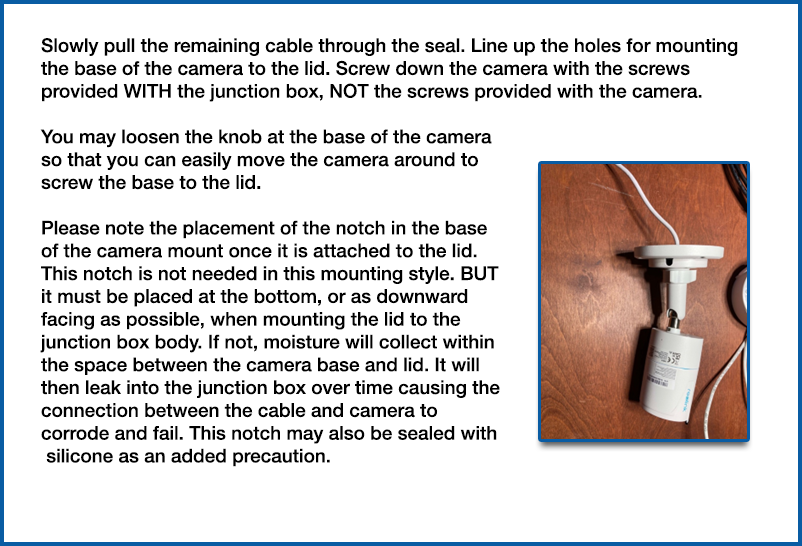
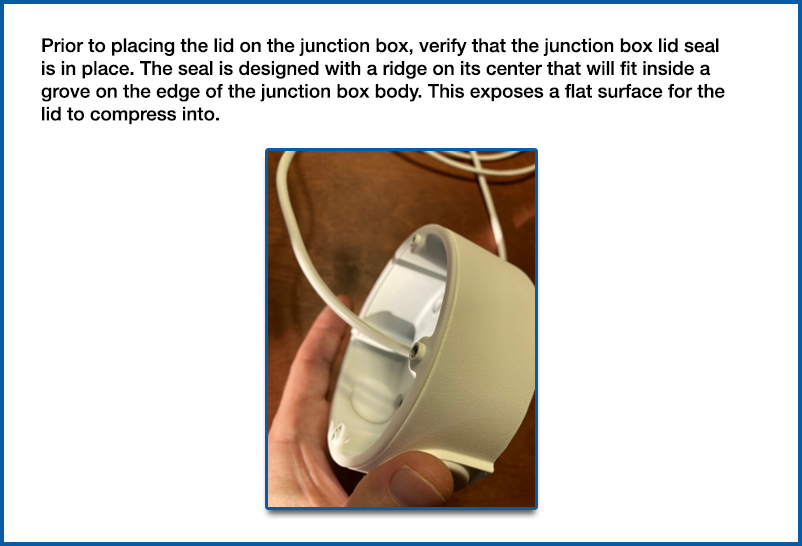
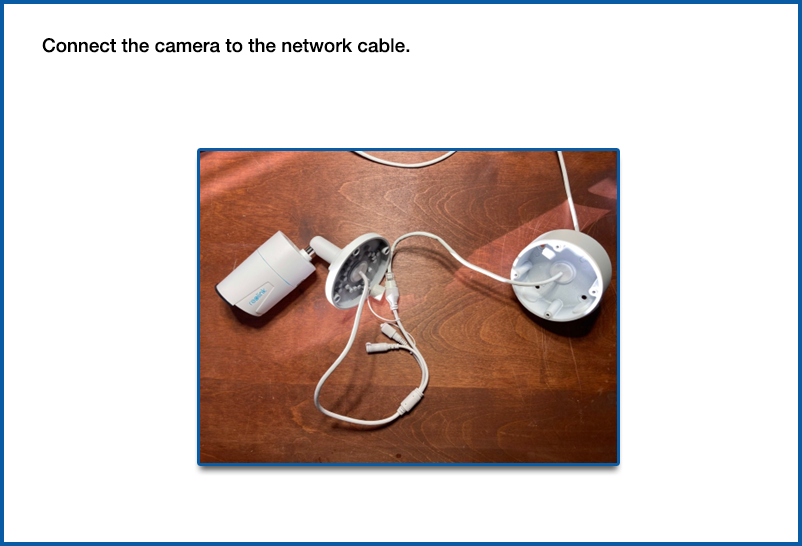
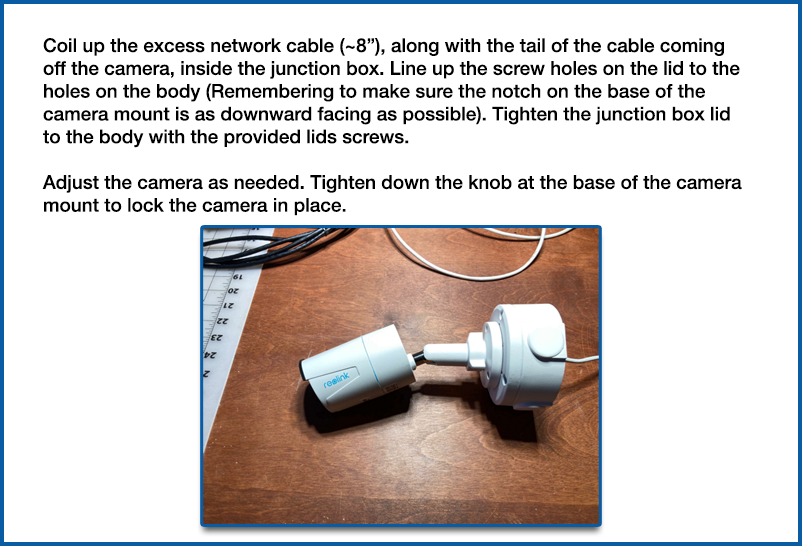
Outdoor Cameras - Junction Box Installation:
Mounting a Camera:
To mount a camera, first select an optimal location as determined by your site assessment. Use a level to accurately mark the drilling points. Then, drill holes at these points and securely insert wall plugs/anchors. Finally, attach the camera and carefully adjust its angle for the best possible coverage. Below is a video guide for our standard provided camera.
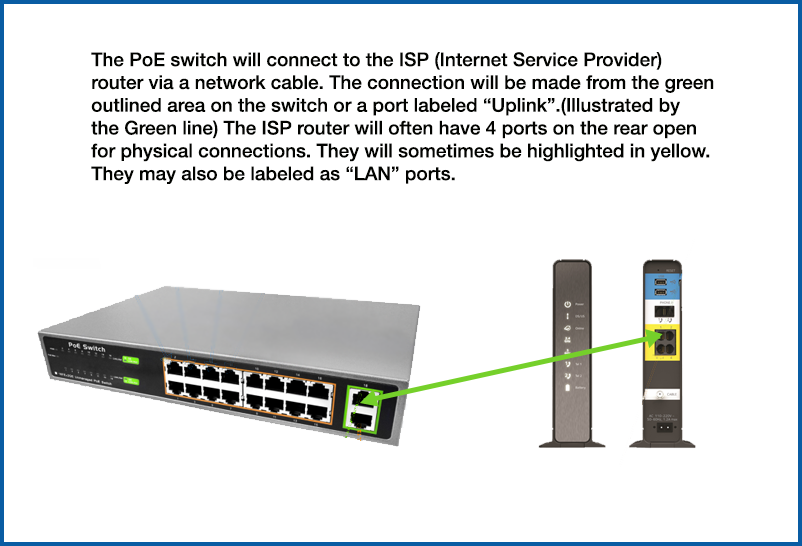
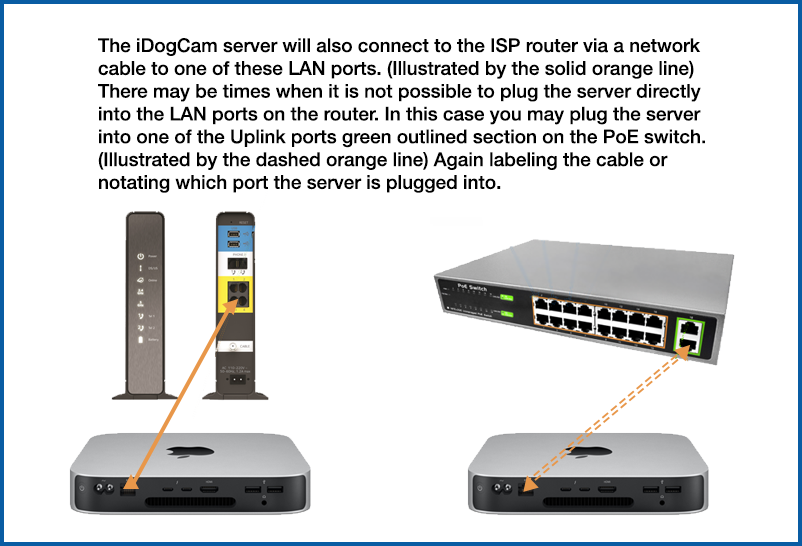
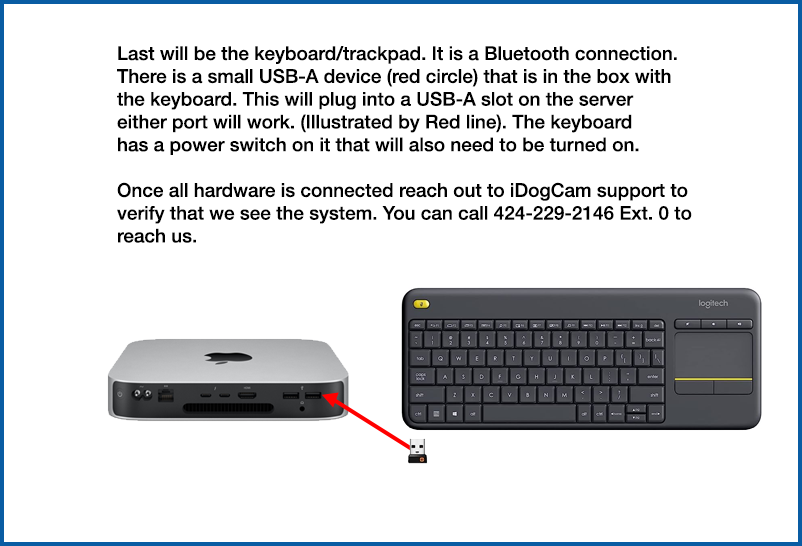
Connecting a Premium System:
First things first; DON’T BE AFRAID TO CALL 424-229-2146 Ext. 0
with any question!
We would rather have multiple 5–10 minute calls
than an extended trouble shooting session.
Connecting a Cloud System:
First things first; DON’T BE AFRAID TO CALL 424-229-2146 Ext. 0
with any question!
We would rather have multiple 5–10 minute calls
than an extended trouble shooting session.
Installation Tips!
Call 424-229-2146 Ext. 0 if in doubt. We would rather have multiple 5–10 minute calls than an extended
trouble shooting session.
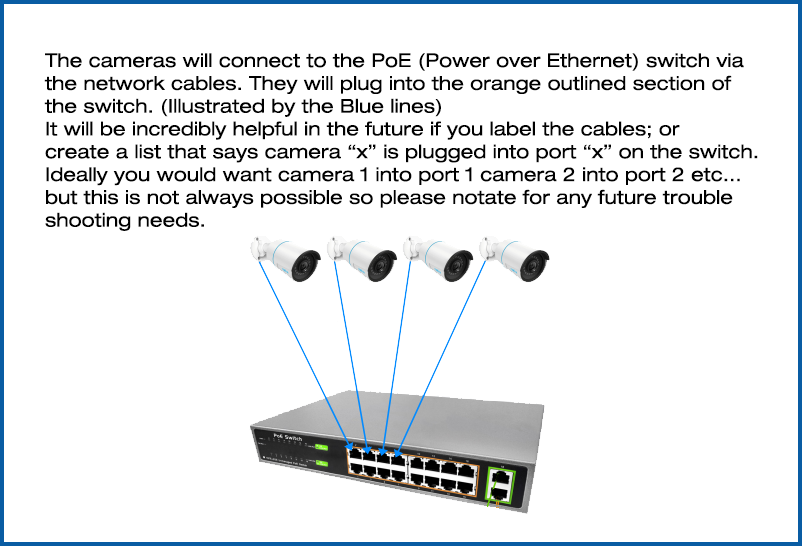
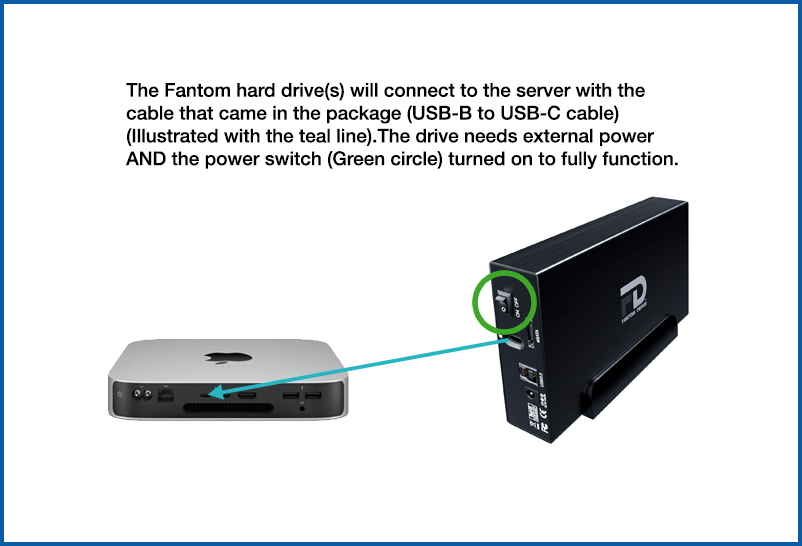
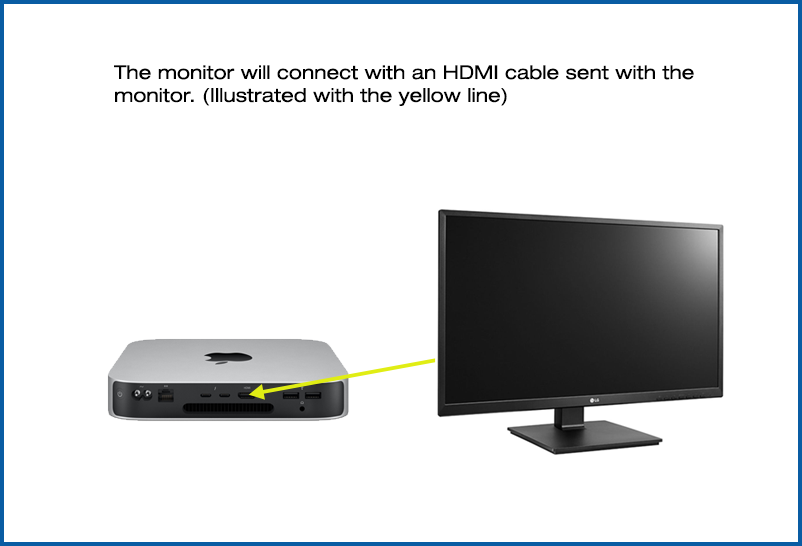
Setup the server monitor and hard drives first. Then connect the PoE switch. Before hanging any
camera in its final location TEST it!
You can do this by plugging the camera into the switch with the short blue cable that came in the box. If all
items are connected the camera will appear in the monitor after a minute or two. This will verify the
camera is good and not damaged from transit. It will also prove that once hung if it does not appear
within a minute or two that you have a cable issue. This will add a little time to your install; but will save
you a headache.
If you don’t test the camera before installation and it does not appear you have to take it down use the
short the blue cable and plug it into the switch figure which is the problem (camera or cable) fix it then go
back and hang again. The extra time to test is better than the headache of running up and down the ladder
and uninstalling/reinstalling the camera. We know from experience.
Label the cables and/or the PoE switch. We also included a blank excel form you can also fill in for what
camera is plugged into what port. Save the form for future trouble shooting.
When possible plug camera 1 into port 1 of the PoE switch camera 2 into port 2 and so on …